My collection of 1/144 models everything for tanks, ships and train lovers in the scale N and Dioramas in the scale 1/144
Most of my designs can be purchased here:
https://www.shapeways.com/shops/panzerfabrik_144
Das Modell stand schon sehr lange auf meiner Wunschliste. Aber immer bin ich am der Kabine gescheitert und die Pumpe am Heck des Fahrzeuges wollte mir auch nicht gelingen. Dabei ist der Opel Blitz TLF 15 die optimale Ergänzung zu meinem Henschel TLF 25/38. Beide Fahrzeuge wurden von der Luftwaffe auf so ziemlich allen Fliegerhosten eingesetzt. Noch der Phänomen Granit 25 als Krankenwagen dazu und meine Flughafen Feuerwehrist fertig.
Dieses mal hat der Druck fast geklappt , das Dach und die Motorhaube musste ich spachteln, die Wandstärke war zu klein und es gab Löcher. Leider fiel es Shapeways auch nicht auf und der Opel Blitz kam wie ein schweizer Käse daher.
Aber die Zeichnung ist schon korrigiert und es befinden sich schon die nächsten Modelle im Warenkorb. Die beiden nächsten Versionen kommen kann in Tannengrün für die Feuerschutzpolizei und in sandgelb für die Luftwaffe.
Eventuell gibt es bald auch noch einen Opel Blitz Krankenwagen in 1/144.
1/144 Opel Blitz TLF 15 Fire Truck
This model has been on my wish list for a very long time. But I always got stuck on the cab, and I couldn’t quite get the pump at the rear of the vehicle right either. Yet the Opel Blitz TLF 15 is the perfect addition to my Henschel TLF 25/38. Both vehicles were used by the Air Force at just about every air base. Add the Phänomen Granit 25 as an ambulance, and my airport fire department is complete.
This time, the printing almost worked—I had to fill in the roof and the hood with putty because the wall thickness was too thin and there were holes. Unfortunately, Shapeways didn’t notice either, and the Opel Blitz arrived looking like Swiss cheese.
But the design has already been corrected, and the next models are already in my shopping cart. The next two versions will be available in fir green for the fire department and in sand yellow for the Air Force.
There might also be an Opel Blitz ambulance in 1/144 scale soon.
Das Fahrgestell des Panzer IV wurde auch als Grundlage für die Entwicklung des oft als Möbelwagen genannten Flugabwehrpanzers benutzt. Der erste Prototyp kam mit der bekannten 2 cm Vierlingsflak.
Diese Version ging jedoch nicht in Serie, sondern die Variante mit dem 3,7 cm Flak. Diese stelle ich etwas später vor. Beide Versionen werden erst einmal mit geschlossenem Aufbau kommen, zum Einsatz musste die Besatzung erst die Seitenwände runterklappen, was oft wertvolle Zeit kostete.
Das Diorama habe ich an einem Abend gebaut. Eine Dose Thunfisch, innen aufgefüttert, den Weg angelegt, die Mauer gebaut, Wiese gesät und schon fertig.
Panzer IV as an anti-aircraft tank
The chassis of the Panzer IV was also used as the basis for the development of the anti-aircraft tank, often referred to as a furniture van. The first prototype came with the well-known 2 cm quadruple anti-aircraft gun.
However, this version did not go into series production; instead, the variant with the 3.7 cm anti-aircraft gun was chosen. I will present this a little later. Both versions initially came with a closed superstructure; to use them, the crew first had to fold down the side walls, which often cost valuable time.
I built the diorama in one evening. I lined the inside of a tuna can, laid out the path, built the wall, sowed the meadow, and it was done.
1. Schritt, die Dose, first step, the can
2. Boden anheben, 2. lift the bottom
3. das Layout für mein Mini-Diorama 3. the layout
4. die Mauer und der weg sind fertig, 4. the wall and rod are done
5. Farbe 5. some colour
6. Strassenbelag aus feinem Sand, 6. pavement with fine sand
7. fast fertig, noch etwas Gras und Farbe fehlen 7. nearly done, just some more paint and grass are missing
Deutscher Brückenlege-Panzer auf Panzer IV in 1-/144
Ich weiss nicht, wie oft ich das Modell jetzt lackiert und nachlackiert habe. 4 Mal reichen bestimmt nicht. Immer wieder sehe ich dann noch kleine Stellen, wo die Farbe noch fehlt. Ich hoffe, jetzt habe ich alles abgedeckt. Radaranlagen sind ja schon zum Bemalen mit dem Pinsel eine Herausforderung, doch der Brückenleger setzte dem noch eins drauf. Dafür habe ich jetzt wohl als einziger einen Brückenlegepanzer in 1/144.
Eventuell werde ich dann doch nochmals eine weitere Version erstellen, sodass man die Brücke abnehmen kann. Aktuell sieht man von der Oberseite der Wanne, diese war mit einer Holzplatte abgedeckt, nichts. Auch habe ich gelesen, dass die Wehrmacht später den Einheiten eine weitere Brücke auf einem LKW mitgab. Leider weiss ich nicht, welcher LKW dies war, vielleicht ein Büssing 5 ton, der die Brücke dann auf seiner Pritsche hatte. Wie diese dann auf den Panzer zum Ablegen kam - reine Spekulation.
German bridgelayer tank on Panzer IV in 1/144
I don't know how many times I've painted and repainted this model. Four times is definitely not enough. I keep seeing little spots where the paint is still missing. I hope I've covered everything now. Radar systems are already a challenge to paint with a brush, but the bridge layer took it one step further. But now I'm probably the only one who has a bridge-laying tank in 1/144 scale.
I might end up creating another version so that the bridge can be removed. Currently, you can't see anything from the top of the hull, which was covered with a wooden panel. I have also read that the Wehrmacht later provided the units with an additional bridge on a truck. Unfortunately, I don't know which truck this was, perhaps a Büssing 5 ton, which then had the bridge on its flatbed. How it was then placed on the tank is pure speculation.
1/144 diorama mit Panzer IV Brückenleger, 1/144 diorama with bridgelayer on Pz. IV
1/144 diorama mit Panzer IV Brückenleger, 1/144 diorama with bridgelayer on Pz. IV
1/144 diorama mit Panzer IV Brückenleger, 1/144 diorama with bridgelayer on Pz. IV
1/144 diorama mit Panzer IV Brückenleger, 1/144 diorama with bridgelayer on Pz. IV
1/144 diorama mit Panzer IV Brückenleger, 1/144 diorama with bridgelayer on Pz. IV
Mal was für zwischendurch, ein neues Diorama, welches in wenigen Stunden entstanden ist.
Die Idee kam mir, da das Filmen der Modelle auf dem kleinen Drehteller auch immer den Teller aus Plexiglas zeigte. Die Umsetzung war recht einfach. Aus Foam habe ich mir gleich mehrere runde Scheiben mit dem passenden Durchmesser geschnitten.
Als Basis kam eine dünne Schicht der selbsttrocknenden Spachtelmasse zum Einsatz. Ebenfalls aus Foam wurden die Hauswände geschnitten und miteinander verklebt. Mit einem Skalpell wurden die Oberflächen bearbeitet. Die kleinen Trümmer entstanden aus kleinen Steinen und Erde.
Zum Einsatz kam ein unveränderter Dragon Jagdtiger. Ich finde der passt da super, mit seinen enormen Abmessungen macht er sich auf dem Platz richtig breit.
1/144 Diorama Hunting tiger looking for prey
Something in between, a new diorama, which was created in a few hours.
The idea came to me because filming the models on the small turntable always showed the Plexiglas plate. The realization was quite simple. I cut several round disks with the right diameter from foam.
A thin layer of the self-drying filler was used as a base. The house walls were also cut out of foam and glued together. The surfaces were finished with a scalpel. The small rubble was created from small stones and earth.
An unmodified Dragon Jagdtiger was used. I think it's a great fit, with its enormous dimensions it really makes itself at home on the site.
Heute stelle ich noch ein weiteres Diorama vor. Es handelt sich um einen Bunker, eine Sonderform, die es so wohl nur in Dänemark gab. Jedenfalls konnte ich keine Regelbau-Nummer für diese Form finden. Zum Glück fand ich eine Zeichnung des Bunkers, sodass ich diesen nachbauen konnte. In Dänemark kam schwere Schiffsartillerie an Land zum Einsatz. Diese wurde zuerst offen und dann später teilweise zum Einsatz gebracht. Diese schweren Geschütze mussten, wie alle anderen Geschütze auch, Zieldaten bekommen. In Dänemark wurden diese großen Entfernungsmesser mit einer Stahlkuppel geschützt und auf einen Bunker gesetzt, in dem es diverse Räume zur Ziel-Datenerfassung und Verarbeitung gab. Den Entfernungsmesser habe ich bereits hier vorgestellt. Der Bunker ist nichts anderes als ein großer Klotz aus Beton, eine Tür und das war es. Daher war der Nachbau auch recht einfach. Ich habe einfach Reste zurechtgeschnitten und alles aus Foam zusammengeklebt. Die Außenseiten habe ich dann verspachtelt und alles geschliffen. Graue Farbe und schon ist der Bunker fertig. Der Entfernungsmesser habe ich mittig auf das Dach geklebt, so wie man es auf den Fotos von den Original Bunkern sieht. Noch etwas Gras und ein paar Bäume und schon war das Diorama fertig. Übrigens ist Hanstholm ein sehr interessanter Ort. Dort hatte die Wehrmacht bzw. Kriegsmarine nach und nach einen riesigen Bunkerkomplex angelegt mit allem, was man zur Versorgung eines so großen Stützpunktes braucht. So gab es dort auch eine Feldbahn / Schmalspurbahn zum Transport der Munition vom Bunker zum Geschütz. Die Bahn fährt heute wieder einen Teil der Strecke und kann von Besuchern benutzt werden. Einfach mal hier schauen: https://www.hanstholmregistreringen.dk/indhold_emneopdelt.html https://bunkermuseumhanstholm.dk/de/
1/144 Bunker with large rangefinder in Denmark Today I am presenting another diorama. This is a bunker, a special shape that probably only existed in Denmark. In any case, I could not find a standard building number for this shape. In any case, I could not find a standard construction number for this shape. Fortunately, I found a drawing of the bunker so that I was able to recreate it. In Denmark, heavy naval artillery was used on land. This was initially open and then later partially deployed. These heavy guns, like all other guns, had to be given target data. In Denmark, these large rangefinders were protected with a steel dome and placed on a bunker, in which there were various rooms for target data acquisition and processing. I have already presented the rangefinder here. The bunker is nothing more than a large block of concrete, one door and that's it. The replica was therefore quite simple. I simply cut up scraps and glued everything together from foam. I then filled the outer sides and sanded everything. Grey paint and the bunker is finished. I glued the rangefinder to the center of the roof, just like you can see in the photos of the original bunkers. I added some grass and a few trees and the diorama was finished. Incidentally, Hanstholm is a very interesting place. The Wehrmacht or Kriegsmarine had gradually built a huge bunker complex there with everything you need to supply such a large base. There was also a light railroad / narrow-gauge railroad to transport the ammunition from the bunker to the gun. Today, part of the line is still in operation and can be used by visitors. Just have a look here: https://www.hanstholmregistreringen.dk/indhold_emneopdelt.html https://bunkermuseumhanstholm.dk/de/
Vorderansicht mit Entfernungsfinder, front view with range finder
Eingangsbereich des Bunkers, entrance area of the German Bunker
Eingangsbereich des Bunkers, entrance area of the German Bunker
Gestern habe ich die Arbeiten an meinem Sturmboottransporter fertig gestellt. Aktuell wird es kein Diorama dazu geben, jedoch habe ich was Schönes gefunden, um das Schiff doch im "Wasser" darzustellen. Das Modell wird nur in 1/144 kommen, die anderen Masstäbe werden wohl zu teuer werden.
Die Montage der Transportgeschirre ist etwas knifflig, bitte hier einfach unter den Links im alten Blog-Beitrag schauen. Die Bemalung ist analog zu dem, was ich in dem Video gesehen habe, weshalb mich mich für ein helles Grau entschieden hatte.
Assault boat transporter in 1/144, Operation Sea Lion
Yesterday I finished the work on my assault boat transporter. Currently there will be no diorama for it, but I found something nice to show the ship in "water" after all. The model will only come in 1/144, the other scales will probably be too expensive.
The assembly of the transport harnesses is a bit tricky, please just check here under the links in the old blog post. The painting is analogous to what I saw in the video, which is why I decided to go with a light gray.
front view of the assault carrier, Vorderansicht des Transportschiffs
Transporter und die Sturmboote, transport ship with the assault boats
1/144 Sturmboot mit Transportschiff, 1/144 German assault boat with his transport ship
Nach der V1 und der V2, was ja beides Raketen bzw. Marschflugkörper waren (hoffe dies ist nicht falsch, ich kenne mich da nicht so gut aus) gab es zum Ende des Krieges noch eine V3. Gelegentlich wird sie auch «fleissiges Lieschen» bezeichnet.
Aber mit der V1 und V2 hat die V3 so rein gar nichts gemein. Bei der V3 handelte es sich um eine Hochdruckkanone, die nur in mehreren Versuchsaufbauten existierte. Die einzige Anlage, die Geschosse in Richtung Feind verschoss, stand in der Nähe von Trier (Lampaden) und schoss auf die anrückende US Army in Richtung Luxemburg. Ziel sollte eine wichtige Strassenkreuzung sein, aber bei einer Streuung von 5 km, hat wohl kein Geschoss diese Kreuzung je getroffen. Der Begriff V3 kam wohl, weil das Projekt unter das Kommando von General Kammerer kam, der alle Vergeltungswaffen unter sich hatte. Wen es interessiert, um den Ort Lampaden gab es Ende März 1945 noch die heftigsten Kämpfe. Obwohl es ja schon zuvor heftige Kämpfe um den nahegelegenen Orscholz Riegel gab, hatte die Wehrmacht auch hier wieder alles zusammengekratzt, was man noch zur Verfügung hatte und versucht den Vormarsch der US Army aufzuhalten.
Bei der V3 handelte es sich um eine Ansammlung von Rohren und Anschlüssen. Das Prinzip sah vor, dass ein Geschoss abgefeuert und im Rohr durch das Zünden weiterer zusätzlicher Treibladungen, immer mehr beschleunigt werden sollte. Man sprach von einer Superkanone. Naja, in der Theorie funktioniert das Prinzip, aber bei den Feldversuchen gab es jede Menge Probleme. Hier ist der Link zu Wikipedia, die können die Wirkungsweise besser erklären. Über Sinn und Zweck der Anlage könnte man jetzt hier viel diskutieren, die Anlage war vor Ort festmontiert, bedurfte eine Schräge von ungefähr 34°, was ja an jeder Ecke der Fall ist, und hatte noch 1000 andere Nachteile. Die Geschosse kamen übrigens von der Firma Röchling, welche in meiner alten Heimat, dem Saarland, ihren Sitz hatte. Die sogenannten Röchling Geschosse waren ca. 2m lang
Die Konstruktion des Modells war recht schnell gemacht, da kommen wieder die Vorteile von 3D voll zum Tragen. Es gibt ein paar Grundelemente und die wiederholen sich mehrfach. Ich habe mich für die Ausführung des einzigen Feldversuches entschieden, dort waren die seitlichen Kammern im 90° Winkel an das Hauptrohr angeschraubt. So weit wie möglich, habe ich versucht die Flansche und Verschraubungen anzudeuten, aber die kommen natürlich in 1/144 nicht so gut raus. Es gab auch Versuche mit schräg angesetzten Kammern. Wie oft beim Druck von 1/144 Modellen, musste ich das ein oder andere Teil auch etwas dicker ausführen, damit es gedruckt werden kann. Das Modell ist ausgerichtet auf die oben beschriebenen 34° Steigung im Gelände. Neben dem Modell gibt es dann noch die Treppe, so wie diese wohl auch bei allen Anlagen zu Wartungszwecken verwendet wurde. Im Moment biete ich das Modell nur in 1/144 an, bei grösseren Massstäben wird das Modell wahrscheinlich recht teuer. Bei Wikipedia kann man auch über den einzigen Einsatz nachlesen. Erst viele Jahre später erlangte dieses Prinzip wieder eine Bedeutung, angeblich soll Saddam Hussain versucht haben auch eine Superkanone nach dem gleichen Wirkungsprinzip zu bauen.
Zur genauen Bemalung liegen mir keine genauen Angaben vor. Daher habe ich mich für ein dunkle Farben für die Verrohrung und einen hellen Holzton für die Treppe entschieden.
Im Internet findet man auch noch einige Fotos, wie der ehemalige Einsatzort heute aussieht. Da ist nichts mehr übrig, lediglich ein in der Nähe eingerichteter Bunker / Schutzraum ist heute noch erkennbar.
Für mein Diorama habe ich mir einen grossen Block Styrodur besorgt und diesen dann so zugeschnitten, dass ich auch eine Schräge von 34° habe. Der Rest ist gesiebte Erde, mit anderen Zutaten gemischt und an einigen Stellen etwas Graspulver, um das ganze etwas aufzulockern.
V3, the last retaliatory weapon of WW2
After the V1 and the V2, which were both rockets or cruise missiles (I hope this is not wrong, I don't know much about them), there was another V3 at the end of the war. Occasionally it is also called the "Busy Little Lily".
But the V3 has nothing in common with the V1 and V2. The V3 was a high-pressure gun that existed only in several experimental setups. The only installation that fired projectiles in the direction of the enemy was located near Trier (Lampaden) and fired at the advancing US Army in the direction of Luxembourg. The target was supposed to be an important road junction, but with a dispersion of 5 km, probably no projectile ever hit this junction. The term V3 probably came because the project came under the command of General Kammerer, who had all the retaliatory weapons under him. For those who are interested, the fiercest fighting was still going on around the village of Lampaden at the end of March 1945. Although there had already been fierce fighting around the nearby Orscholz Riegel, the Wehrmacht had once again scraped together everything they had left and tried to stop the US Army's advance.
The V3 was a collection of tubes and ports, the principle being that a projectile was fired and accelerated in the tube by the ignition of additional propellant charges. One spoke of a super cannon. Well, in theory the principle works, but during the field tests there were a lot of problems. Here is the link to Wikipedia, they can explain the principle better. There could be a lot of discussion here about the purpose of the installation, it was fixed on site, required a slope of about 34°, which is the case at every corner, and had 1000 other disadvantages. By the way, the bullets came from the company Röchling, which was based in my old home, the Saarland. The so-called Röchling bullets were about 2m long.
The construction of the model was done quite fast, there again the advantages of 3D come into full effect. There are a few basic elements and they repeat several times. I decided to use the design of the only field test, there the side chambers were screwed to the main tube at a 90° angle. As much as possible, I tried to indicate the flanges and bolted connections, but of course they don't come out so well in 1/144. There were also attempts with chambers set at an angle. As is often the case when printing 1/144 models, I also had to make one or the other part a bit thicker so that it could be printed. The model is oriented for the 34° slope in the terrain described above. Next to the model there is the staircase, as it was probably used on all layouts for maintenance purposes. At the moment I offer the model only in 1/144, for larger scales the model will probably be quite expensive. At Wikipedia you can also read about the only use. Only many years later this principle became important again, allegedly Saddam Hussain tried to build a super cannon based on the same principle.
I have no exact information about the painting. Therefore I decided to use a dark grey for the piping and a light wood tone for the stairs.
On the internet you can also find some photos of how the former site looks like today. There is nothing left, only a nearby bunker / shelter is still recognizable today.
For my diorama I got a big block of styrodur and cut it so that I also have a slope of 34°. The rest is sifted earth, mixed with other ingredients and in some places some grass powder to loosen the whole thing up a bit.
Das fertige 3D Modell, the fresh printed 3D modell
Hier sieht man die ganze Länge des Modells, Here you see how log the design is
Detailansicht, detailed view
Erste Teile angemalt und ausgerichtet, Painting started and arranged
Im Original 58 m lang, In real the installation was 58 m long
1/144 Hanomag Zugmaschine mit Munitionsanhänger, 1/144 Hanomag tractor with ammo trailer
Den Culemeyer Anhänger habe ich komplett überarbeitet und die Abmessungen leicht angepasst. Auch wenn die Beladung es verbirgt, die Anhänger haben ein schöneres Innenleben bekommen und werden wohl auch bald ohne Beladung kommen.
The Culemeyer trailer I have completely revised and slightly adjusted the dimensions. Even if the loading hides it, the trailers got a nicer interior and will probably come soon without loading.
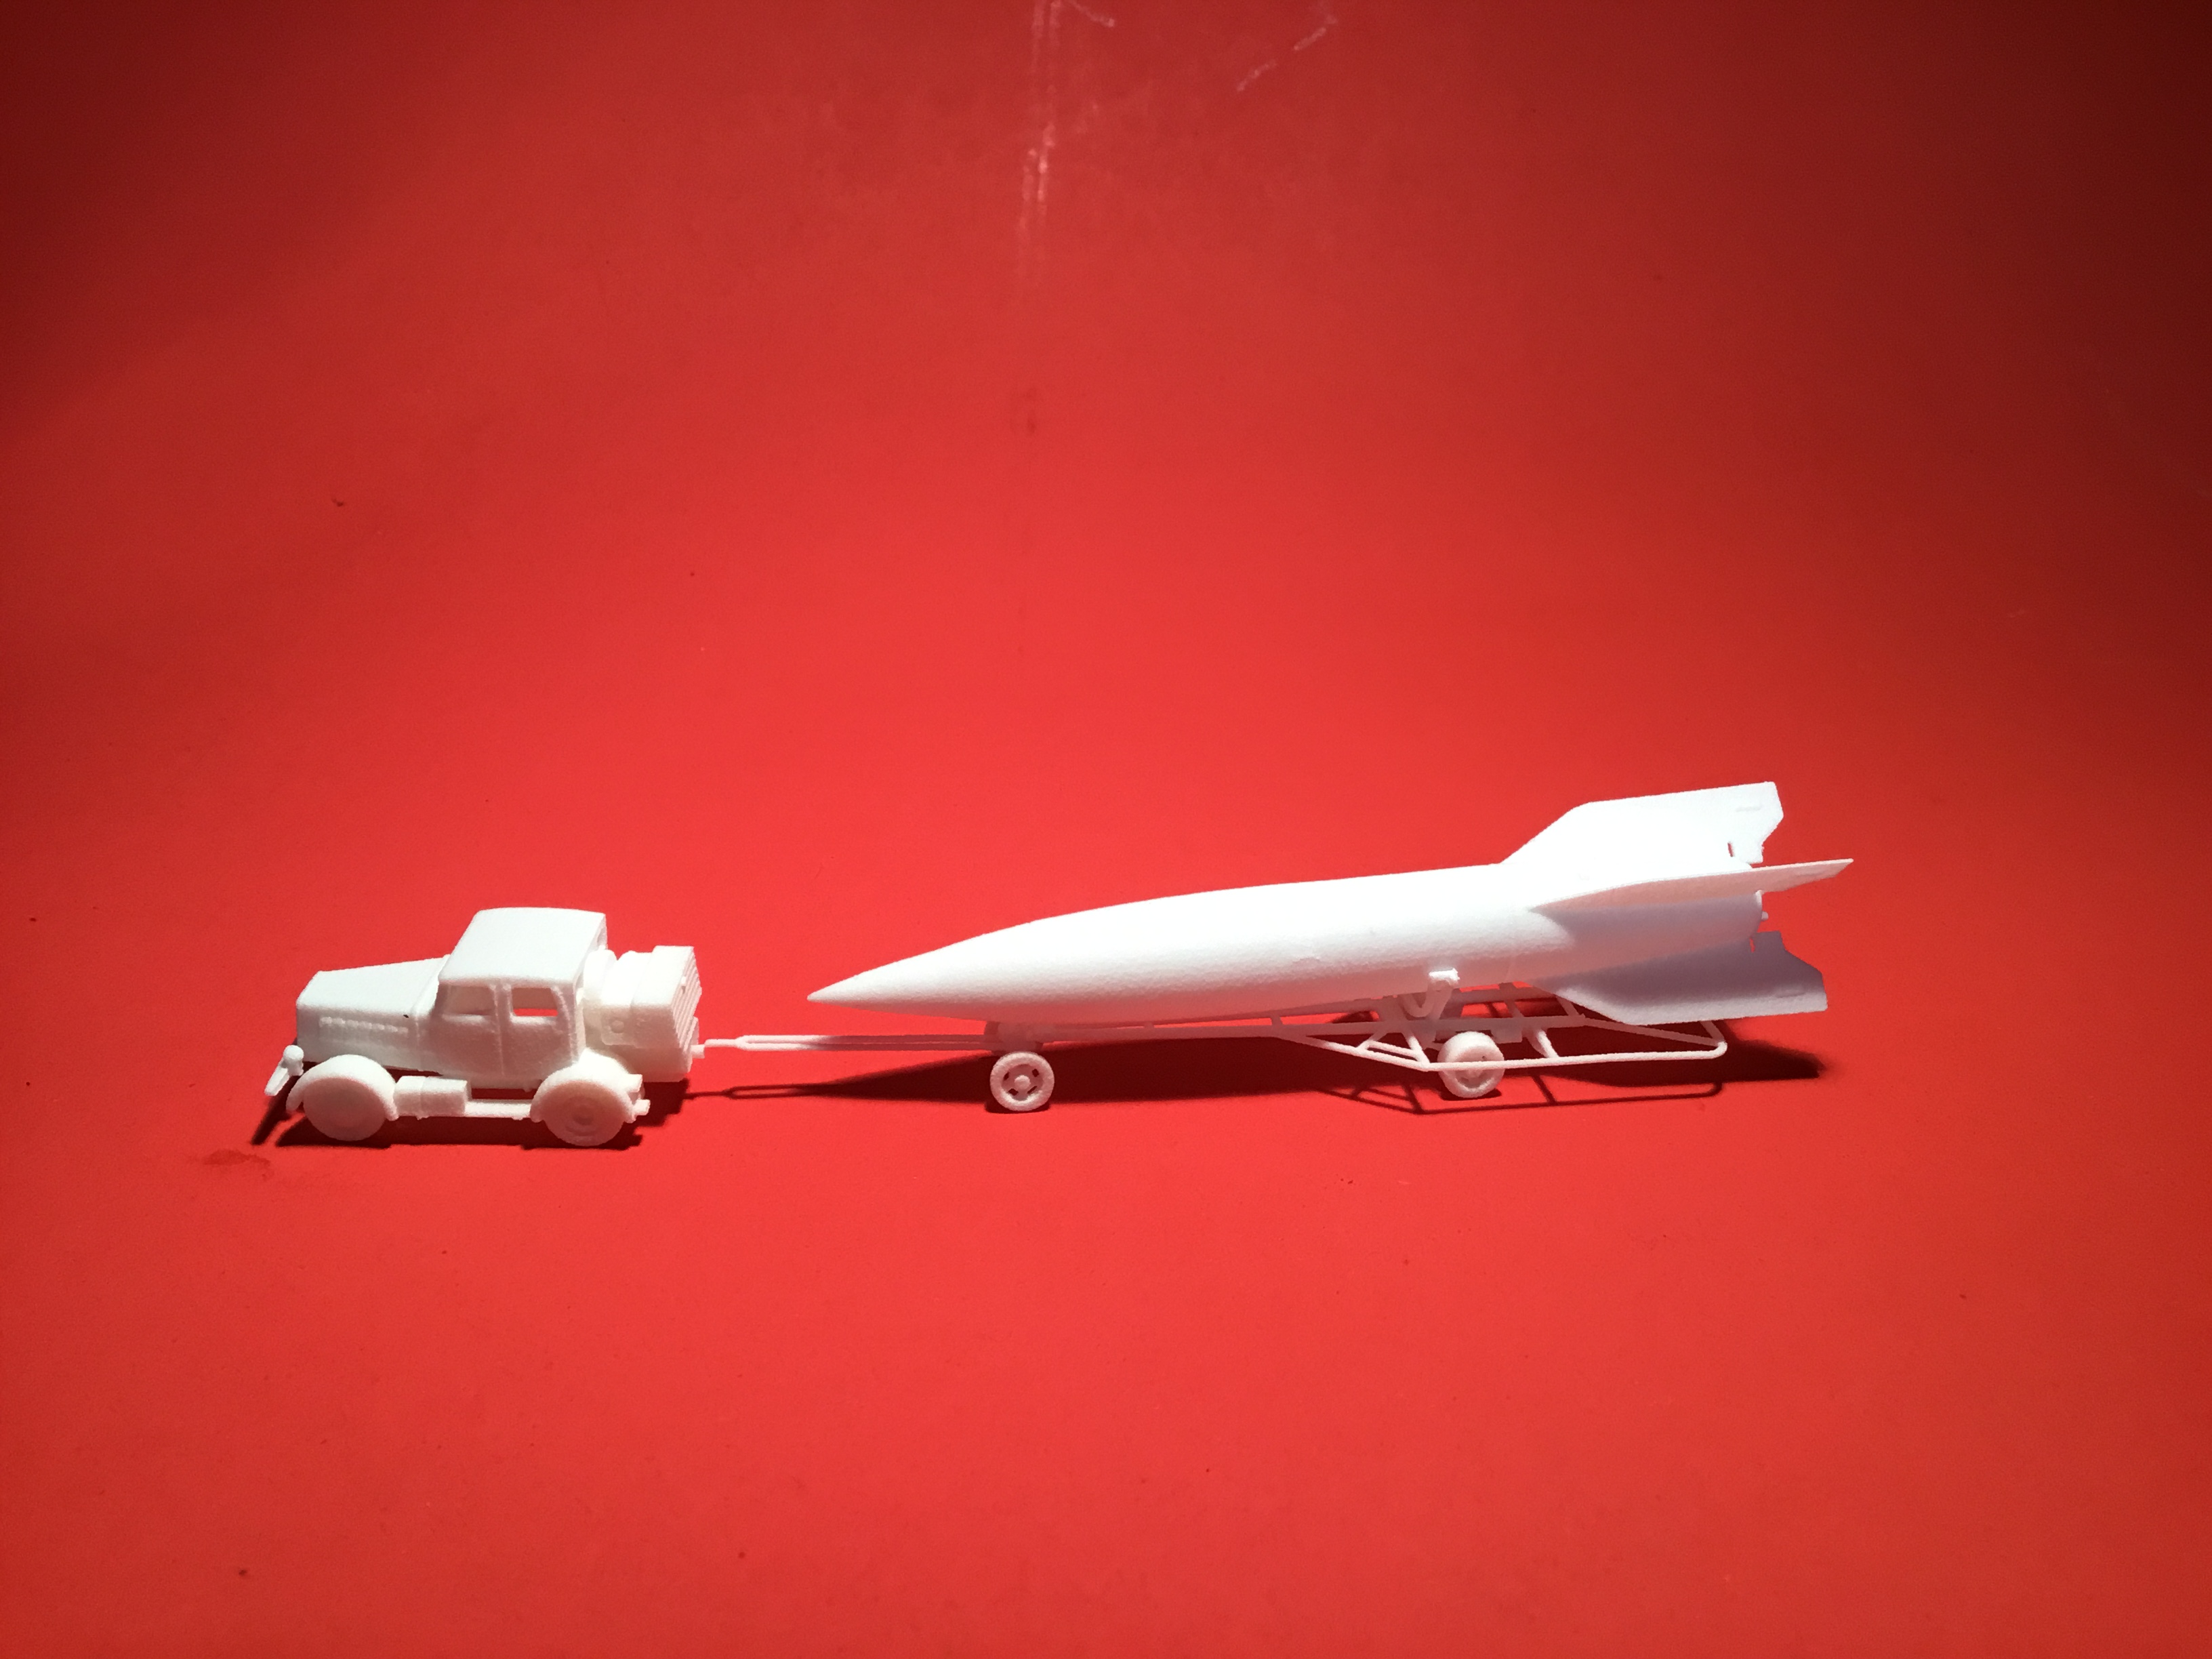
1/144 V2 + Vidal + Hanomag SS 100
1/144 V2 + Vidal + Hanomag SS 100
Der Vidalwagen wurde zum Transport der V2 benutzt. Der sog. Meiler Wagen diente zum Aufrichten und Starten der V2 Rakete. Zum Transport wurde er nie benutzt. Die Umsetzung auf die Anhänger erfolgte immer mit dem Fries oder auch Strabokran genannten mobilen Kran.
The Vidal trailer was used to transport the V2. The so-called Meiler trailer was used for erecting and launching the V2 rocket. It was never used for transport. The transfer to the trailers was always done with the mobile crane called Fries or Strabokran.
Teigknetanhänger und die korrigierte Feldbäckerei, bread dough trailer with revised field bakkery
Tatra T 25 Zugmaschine in 1/144, Tatra tractor T 25 in 1/144
Tatra und 30,5 cm Mörser M 16
M 16 Mortar with the Tatra tractor
Alle Neuheiten habe ich auch wieder in einem Video zusammengepackt und dort kurz vorgestellt:
I have combined all news with some other pictures in a short video: